How to build your first house: Difference between revisions
>Chris No edit summary |
>Chris No edit summary |
(No difference)
| |
Revision as of 01:33, 16 May 2018
This article will tell you how to make a new world, build a house, and light it up in Minetest Game.
Starting a new world
First of all, with Minetest open, you must create a new world. To do this click “New” on the startup screen. All you need to do is type in the name for your new world. Then click on “Create”.
Now that you have made your world, you will need to play on it. Select it by clicking on its name on the list then click “play”. You will get a progress bar showing the game loading the world.
Voila! You should appear in a new world. However, there is no point just standing there. By default, the W key moves you forward, the D moves you right, the A moves you left, and the S moves you backwards. Jump with space bar. To turn, and look up and down, simply move the mouse. (See also: Controls.)
First resources
Now that you know how to move, you will need to obtain some wooden planks. This is one of the first and most important tasks to get started in Minetest Game.
Finding trees or bushes
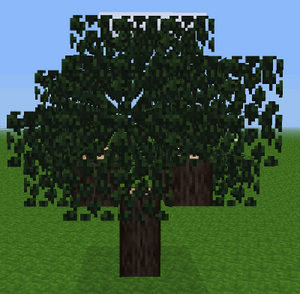
First, you need to find a tree or bush. There are several species of trees and bushes. Trees are better than bushes as they yield more wood.
If you don't see a tree or bush immediately, just walk around until you see one.
- Tip: If you started in the middle of nowhere, first walk around until you see grassy plains, then head there. You may find bushes in plains, and forests are usually not far away. If the grass has a yellowy color, it's dry grass and you've found a savannah, the home of acacia trees
- Tip: If you started in the middle of the ocean, you need to swim to land. Just hold down the space bar when in Water to stay afloat and don't drown!
Chopping down a tree
If you found a tree, move towards a tree trunk (any species will do), and look at it. When you are close enough, you should see a black outline around the section of trunk you are looking at. Next you need to hold down the left mouse button. You should see cracks appearing on the tree. After a few seconds, the bit of trunk you were looking at will disappear. You will probably now be holding it in your hand. What you just did is called “mining”. If you can see a small picture of a tree section in one of the boxes at the bottom of your screen, it means it is an item in your inventory. Those boxes are your hotbar. To select different items from the hotbar, use the mouse wheel, or the number keys 1-8.
Chopping down a bush
Bushes are an alternative source of wooden planks, but they yield less wood. To chop one down, do the same as you would with trees, except you walk towards a bush (any species will do), then first mine the bush leaves (in order to reach the bush stem), then the bush stem.
Using your inventory
After you got your tree trunks or bush stems, open your inventory.
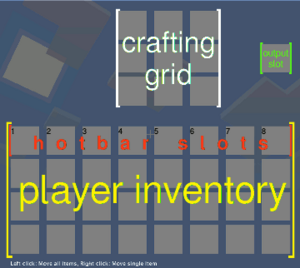
To open your inventory menu, press the I key on your keyboard. The screen should now have several rows of grey boxes on it. These are the various slots of your inventory. To move items around, left click on them with the mouse, then click where you want to put them (an empty box).
Now, break some more bits of tree or bush stem. You should now see a small number next to the item picture in your inventory. This indicates how many pieces of this item you have.
When you open your inventory, you will see a 3×3 box of squares at the top. This is the crafting grid. It is where you craft the various items.
You will now need to craft wooden planks. To do this, click on the tree or bush stem items to select them. Next, place them anywhere in the crafting grid. In your inventory menu it now should like this:
| Name | Ingredients | Input → Output | ||||||||||||
|---|---|---|---|---|---|---|---|---|---|---|---|---|---|---|
| Wooden Planks | Tree |
|
Or like this:
| Name | Ingredients | Input → Output | ||||||||||||
|---|---|---|---|---|---|---|---|---|---|---|---|---|---|---|
| Wooden Planks | Bush Stem |
|
If you chopped a different tree or bush species (e.g. acacia tree), it will give you a different kind of wood, but will otherwise behave identically.
In the box just to the right of the grid, you will see an image of wooden planks (or similar). Click on this, and you will pick up wooden planks. You should also see a log disappear from the stack of logs in the crafting grid. Congratulations! You have crafted your first item! You can place (almost) any block in your world by walking up to another node, and right-clicking on a face to put the node you are holding there.
Crafting the first tool
Before you make your house, though, there is another 2 crafts you will have to do. The first one is making sticks. Select the wooden planks in your inventory. Then, right-click any one of the slots in the crafting grid. This will only place one wooden plank in there, instead of the whole stack. Then left click somewhere else in your inventory to place the remaining wooden planks there. The crafting output box should now show sticks. Click on the stick item to receive the four sticks.
| Name | Ingredients | Input → Output | ||||||||||||
|---|---|---|---|---|---|---|---|---|---|---|---|---|---|---|
| Stick | Wooden Planks |
|
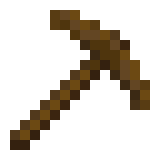
Now, for your first tool! It is a wooden pickaxe. It is used to mine stone, ores and some other blocks. To make the wooden pickaxe, using right click, place 1 wooden plank (any species) in each of the 3 boxes at the top of the crafting grid. Next, place sticks in the center of the middle and bottom rows. The output will show a pickaxe.
| Name | Ingredients | Input → Output | ||||||||||||
|---|---|---|---|---|---|---|---|---|---|---|---|---|---|---|
| Wooden Pickaxe | Wooden Planks + Sticks |
|
Take the pickaxe, and put it at the top of your inventory. Exit the inventory, then scroll to select it. You should now appear to be holding it.
Some serious mining and crafting
Now, for stone. Walk around until you see grey blocks. These can often be seen in cliffs whilst above ground. Go up to them, and using the pickaxe, break about 12 of them like you did with the tree. You will find they turned into a material called “cobblestone” in your inventory.
By now, it will probably be getting dark. You will need to make torches for light.
To make torches, walk around until you see what looks like stone, with black spots on it.
This is coal ore.
Break the whole cluster of coal with your pickaxe, it won’t take long.
Next, make some more sticks. At the bottom of the crafting grid put a stick in one of the boxes, then put a coal lump (this is what you get when you mine coal) above it. You will get four torches.
| Name | Ingredients | Input → Output | ||||||||||||
|---|---|---|---|---|---|---|---|---|---|---|---|---|---|---|
| Torch | Stick + Coal Lump |
|
Place these like regular blocks, and they will emit light. The torches don't burn out, so you can leave them burning all day.
Building a house
Now to make a house. You can use this as your base.
Build it how you like, for now just use wooden planks (break more trees to make them).
Use torches to light up your house.
See also Building a home.
Next you will want to make a furnace.
To craft it, fill the crafting grid with cobblestone, leaving the very centre box empty:
| Name | Ingredients | Input → Output | ||||||||||||
|---|---|---|---|---|---|---|---|---|---|---|---|---|---|---|
| Furnace | Cobblestone |
|
Take the furnace from the output slot.
Place your furnace somewhere in your house.
You will use the furnace to smelt ores, once you mine them.
But don’t worry about that yet.
Because you just completed your first awesome house, I hope you like your new home! :-)
Further reading
You probably have noticed that some of the crafting recipes you just use have variants. E.g. the wooden pickaxe could also be crafted with acacia wooden planks instead of regular wooden planks. Read Crafting and the respective item pages to learn more about this.

